Automate your Azure Documentation and Diagrams
Cloudockit automatically generates documents, reports and diagrams for your Azure environments in order to avoid creating them manually.
After generating your first Microsoft Azure documents, you will be able to schedule future generations instead of visiting Cloudockit.com and triggering them manually.
Cloudockit supports 2 different methods of scheduling:
- Online Automation (web app): You trigger the document generation by calling Cloudockit API and we do the generation for you.
- On-Prem Automation: You install a Windows Application that does the document generation locally on your server.
Let’s have a look at these two options in detail.
Online Azure Documentation Generator
When using the Online Automation Tool, Cloudockit will automatically set up a RunBook in your Azure subscription that will call Cloudockit API to generate your documents. This way, Cloudockit is not the one calling your environments. For security reasons, It was built this way because Cloudockit does not store any information that would allow us to connect to your Azure environments.
To use these settings, you first need to login to Cloudockit and select a subscription.
Notes:
- Currently, this automation mode only supports one subscription generation. You can select multiple subscriptions to appear in the same Word document, however, you cannot start different processes for multiple subscriptions.
- As the document generation is initiated on Cloudockit environments, there is a limit on the number of Online Automation Profiles you can create. If you want more Online Automation Profile, you can use On-Prem automation.
After selecting your subscription, establish the settings you want to use to generate the document. Typically, you will set the email where the content should be sent and set the appropriate filters and options.
Once you have chosen the appropriate settings, click on Automation to view the following options:
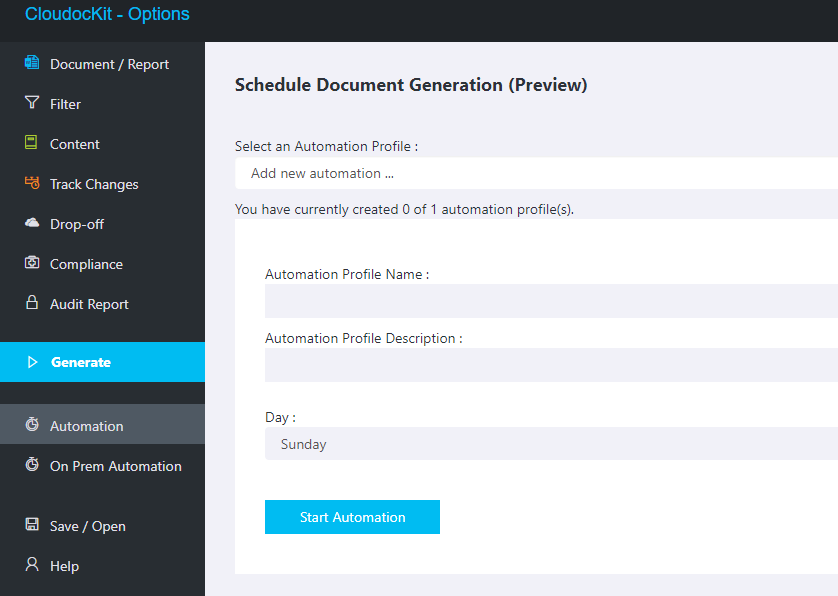
You are asked to enter the name of what we call an Automation Profile, which is basically a Schedule. Secondly, enter the day you want the document generation to take place. When you click on Start Automation, you will see the following options:
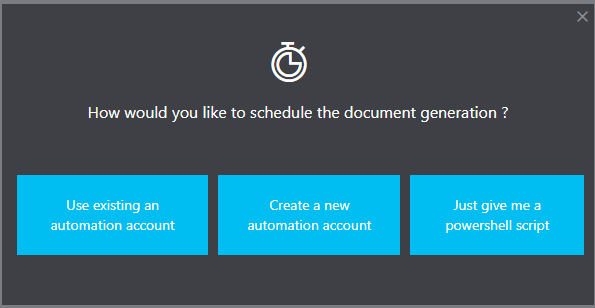
- Use an existing automation account: Cloudockit can re-use one of your existing Azure Automation Accounts and create a new RunBook for Cloudockit to schedule.
- Create a new automation account: Cloudockit will create a new Automation Account and create a RunBook inside this newly created account. When you select this option, you will see there are some pre-requisites like having the permissions to create a Resource Group.
- Just give me a Powershell script: This will give you a Powershell script that you will trigger yourself. The Powershell script is basically the same as the one started in the Automation Account for the 2 previous options.
Cloudockit’s Azure diagram generator will save you time and money
On-Prem Microsoft Azure Automation
With the On-Premise Automation Profiles, you use a Windows Application on one of your servers to schedule the document generation.
The two-step process is as follows.
Step 1: Create Automation Profiles using the On-Prem Automation tab
When you click on the On-Prem Automation tab, you will be able to create a new On-Premise Automation Profile:
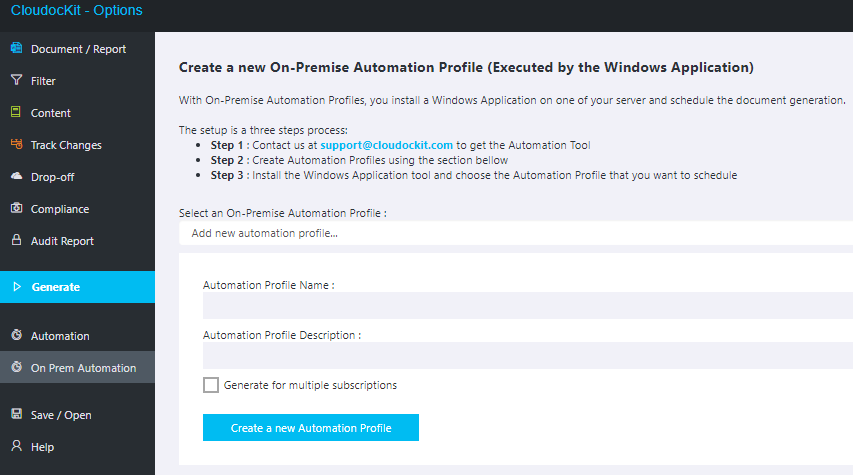
When clicking on Create a new Automation Profile, it will automatically take your current settings and save them as a Profile.
For On-Premise automation, Cloudockit gives you the ability to select multiple subscriptions. For each subscription, you will then be able to override a few settings. Those settings include the email where you want to send the documents and the storage you would like to use.

Once you have created your Automation Profiles, you are ready to go to the next step and schedule those profiles.
Step 2: Install the Windows Application tool and choose the Automation Profile you want to schedule
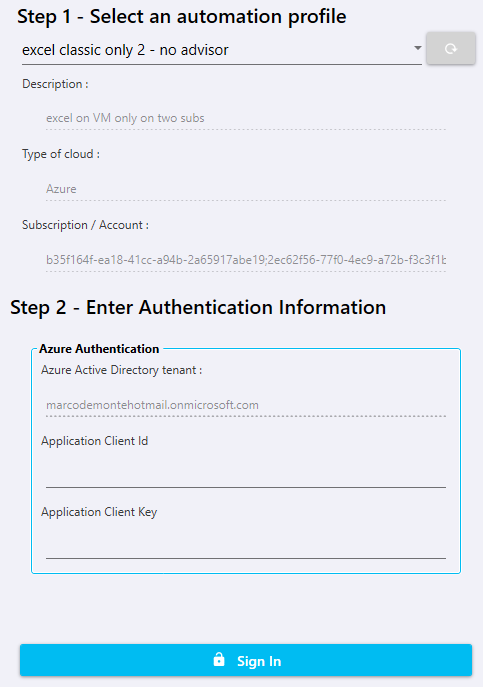
First, contact support@cloudockit.com to get the Automation Tool.
Once you get it, you will install the simple standard MS. Once installed, enter your product key that it is associated with your account.
The first step is to click on New Schedule in the tool and select the Automation Profile that you would. If you do not see any automation profiles, please be sure the product key you used for the Windows Application Tool and for the Website matches.
As you can see, when you select an Automation Profile, it will automatically retrieve the settings of the profile. Everything related to Authentication and Security is empty because this is NOT stored at Cloudockit. You will have to manually enter the authentication keys (refer to the Tool Guide for more details about the setup). Those keys will be stored locally on your server and will never be shared.
Once you enter your keys and click Sign In, Cloudockit will test the Authentication. Afterward, it will then ask you to Test or Schedule the document generation.
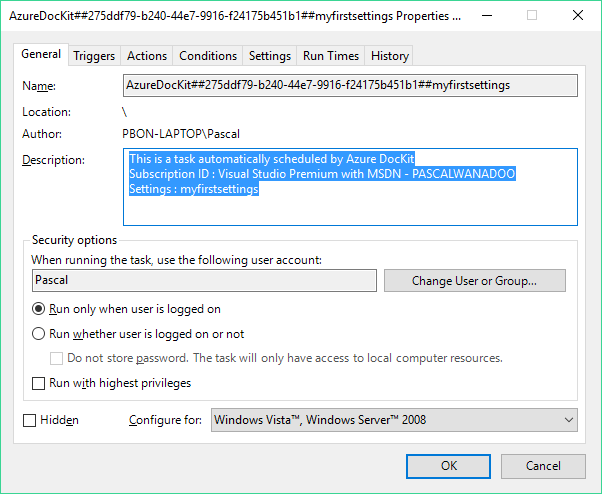
When you choose to schedule the document generation, it will display the Windows Scheduler. The tool simply creates a Windows Scheduled Task to trigger the process:
We hope you enjoyed this article and we strongly encourage you to schedule your documents for ease and management.
As always, feedbacks are greatly appreciated.