Cloudockit Now Supports Traffic Manager Plus Control Permissions in your Azure
Microsoft Azure Traffic Manager allows you to control the distribution of user traffic to your specified endpoints, which can include Azure cloud services, websites, and other endpoints.
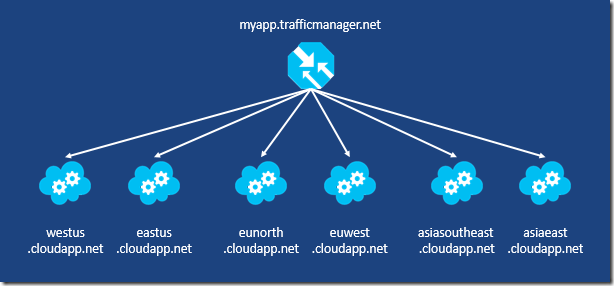
As an example, the following diagram shows a Traffic Manager profile that distributes traffic across multiple Endpoints.

Cloudockit now allows you to fully document your Traffic Manager profiles.
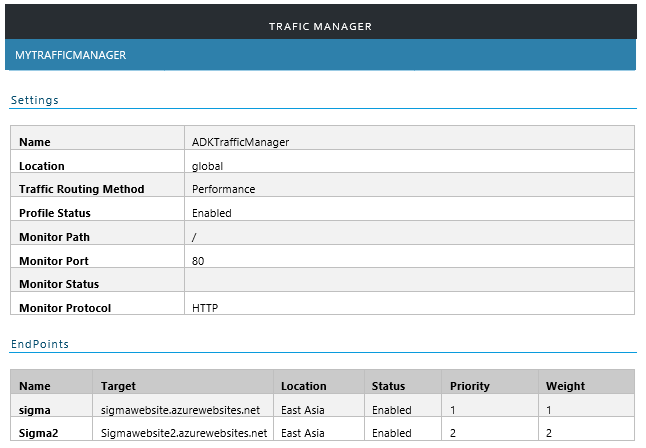
You can visualize all the details including Traffic Routing Method, the Location and the Monitor information (path, protocol, status…). You also get a list of all the Endpoints including their location, Priority and Weight.
As an example, here is a screenshot for a simple Traffic Manager Profile:

Controlling Permissions in Your Azure Subscriptions
Azure is using Role-Based Access Control (RBAC) to enable fine-grained access management for Azure. This means you can grant access to a specific resource (or set of resources) to any user without having to give the person Service Administrator privileges.
Quick example: You have an Azure Subscriptions with 10 Virtual Machines and you want to give access to John a specific virtual machine named MyAzureVM.
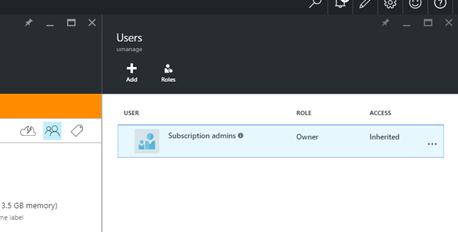
From the Azure Portal, you can give John access in the Role settings of the Virtual Machine:

Afterwards, with the Add button, you can give John access to the Virtual Machine.
You can do the same with any employee and for any Virtual Machine. By doing so, you can be completely lost and you don’t know who has access to what.
Cloudockit’s diagram generator will save you time and money
Cloudockit Security Reports
Thankfully, Cloudockit Security reports will help you to answer those simple questions:
- Question 1: Who can change the settings of the Virtual Machine PrdSP-NYC.
In the Cloudockit Security Report, go to the Virtual Machine PrdSP-NYC, you will see the following table:

- Question 2: On which Azure resource do I have specific permissions?
In the Cloudockit Security Report, you will see a table that contains all the resources that have specific permissions.

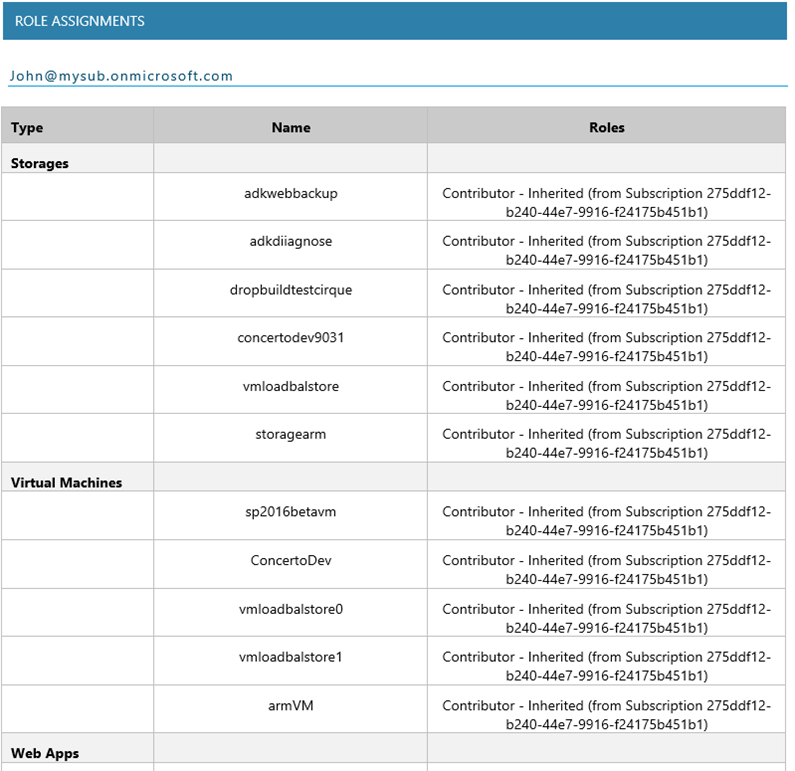
- Question 3: Which Azure resources can be accessed by John?
In the Cloudockit Security Report, you will see a table that contains all the permissions for each specific user.
