Create a user in AWS for Cloudockit
When you connect to your AWS Account, you can create the Access Keys for an existing user or you can create a new user dedicated to Cloudockit (recommended).
When creating a new user for Cloudockit, this is recommended to give Read-Only permissions and the billing access to that you get a full report.
Here are the steps on how to do that.
- Please click the following URL to open IAM console on AWS Management Console
https://docs.aws.amazon.com/iam/index.html
- Click on Add User
- Enter a name (for example Cloudockit)
- In Access Type, check Programmatic access
- Then, click on Attach existing policies directly
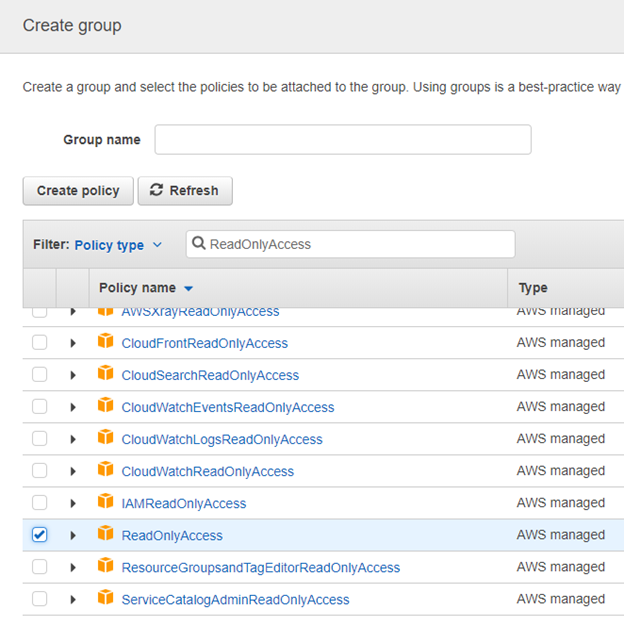
- For security constraint with the new user, you only need attach ReadOnlyAccess policy to the group to which the user belongs.
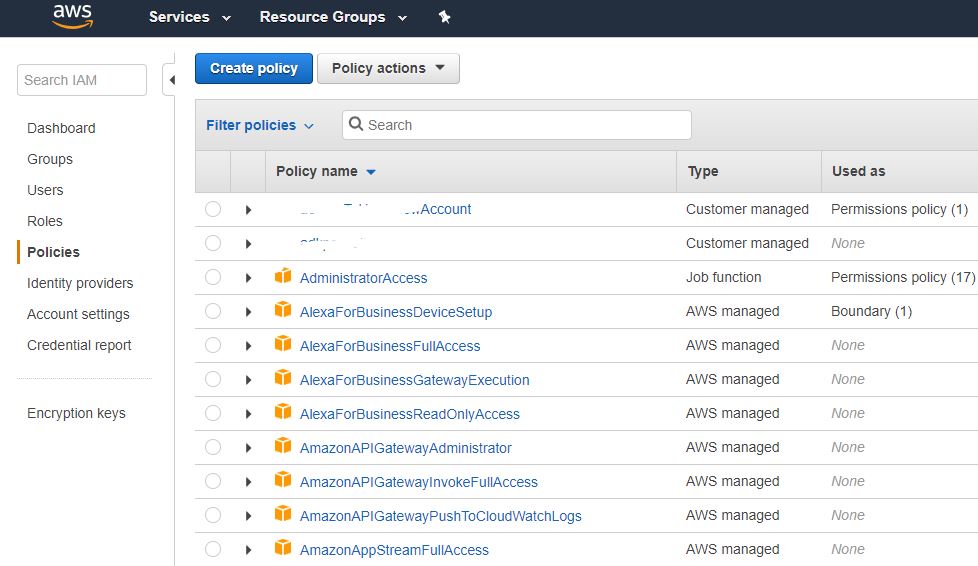
- Then, we will add a policy that allows to read billing and add it to the newly created user. To do that, first click on Policies on the left menu

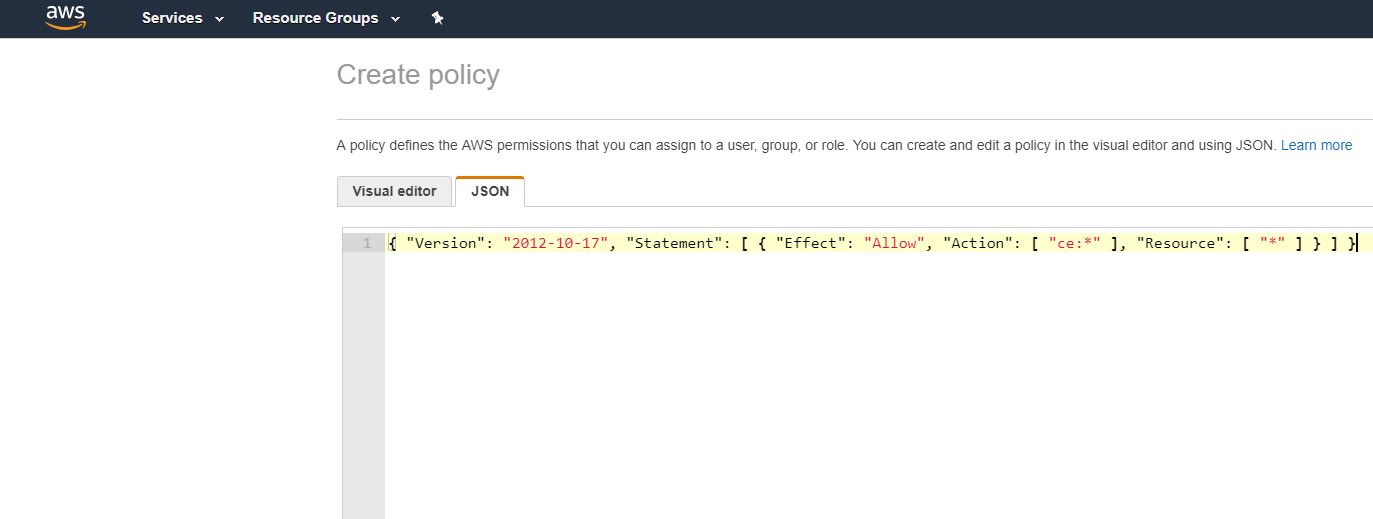
- Click on Create Policy and click on the JSON Tab to paste the following JSON (be carefull with the quote when you paste):

{ "Version": "2012-10-17", "Statement": [ { "Effect": "Allow", "Action": [ "ce:*" ], "Resource": [ "*" ] } ] }
- Then, click on Review Policy and give it a name like BillingPolicyReader and click on Create Policy
- Go back to the user you have created at the beginning and click on Add Permissions, Select Attach Existing Policies directly and choose BillingPolicyReader
