How Powerful is Cloudockit's Azure Documentation Generator?
With Cloudockit, you do not need to install or change anything in your Azure environment. You can automatically generate technical documentation and reports. Cloudockit is using standard Azure APIs to retrieve all the metadata that is necessary to automatically generate the reports. With that in mind, you can generate complete technical documentation in a matter of minutes, depending on the size of your deployment.
Why Document Your Azure Environment?
Firstly, ask yourself why do you need technical documentation?
- For security reasons, you do not want to give access to the Azure portal to more than a few people
- You want to keep a track of the history of your Azure deployments
- If you are planning on developing automatic administration tools for your Azure environment. You will need to extract the components of your environment in a normalized way
- To be aware of all the security holes you have in your environment
- If you are currently in the process of being ISO certified or audited for any other certification
Easy to Customize for You and Your Company
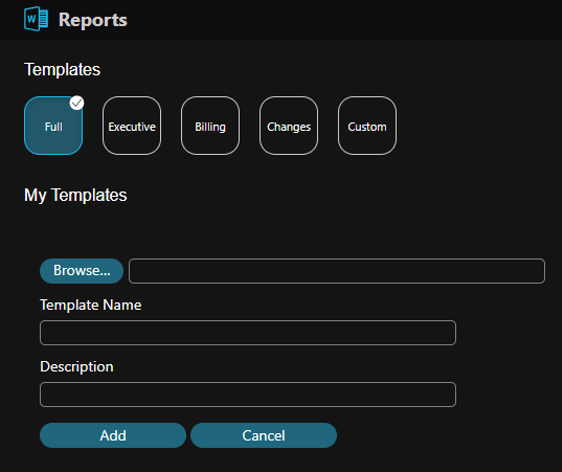
When you create your documentation, you might want to use your company branding (logo, styles, pictures, header, and footer). Cloudockit allows you too easily customize your reports by selecting any Word document that you have. The software will use your Word template and automatically insert Cloudockit’s content after.
No Need to be God to Generate Your Reports
With Cloudockit, you do not need to have high privileges to generate your documentation and reports. The software will automatically take the privileges you have and use them to scan your environment. For example, if you only have “read access” to a specific Azure resource group with web services and virtual machines inside, then only those components will be documented in your reports.
Cloudockit supports multiple authentication scenarios like oAuth and Azure Active Directory application. Finally, Cloudockit supports both public clouds and government subscriptions.
Detailed Microsoft Azure Reports
One of Cloudockit’s biggest strengths is to generate very deep technical documentation and reports with plenty of information and detail.
For example, here are some details about the document generated for an Azure virtual machine:

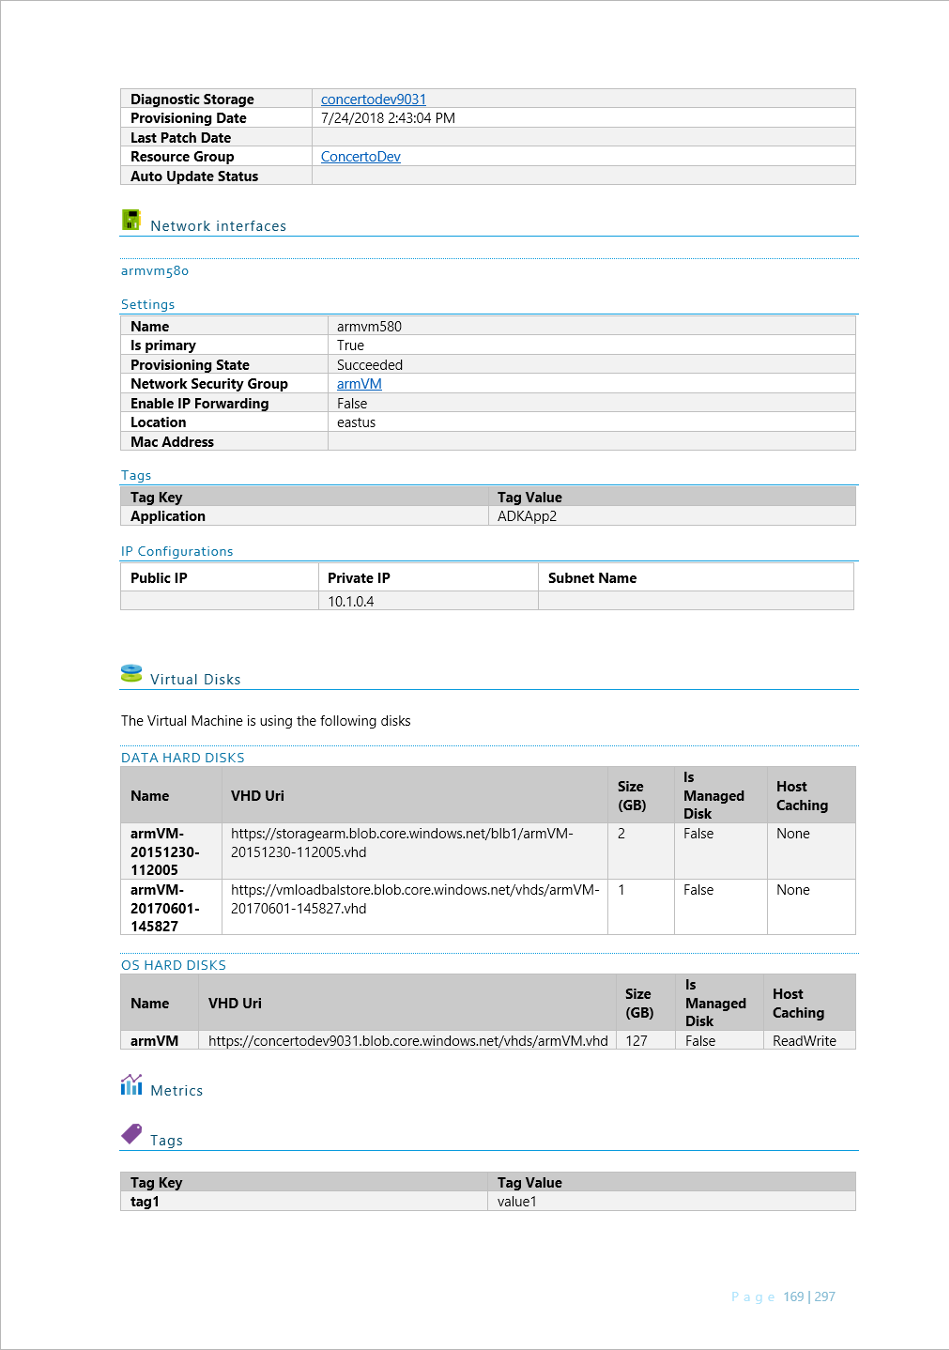
As you can see above, the report starts with a cloud architecture diagram. It is followed by the technical details of all the components including the Hard Disks, network interfaces, tags, and much more.
Cloudockit allows you to customize what is written in the reports by using simple Word editing with standard placeholders. Furthermore, the software provides built-in templates with fewer or more details depending on what you are trying to achieve.
Easily visualize your cloud’s architecture to avoid making catastrophic mistakes
Automated Azure Technical Documentation
The software offers multiple options to automate the Azure document generation. You can use Cloudockit’s web app with the built-in rest API or use Cloudockit Desktop which gives you strong scheduling features. The Desktop version offers the same tools as Cloudockit website, however, it runs locally in your cloud environment.
A Powerful Tool to Track Changes
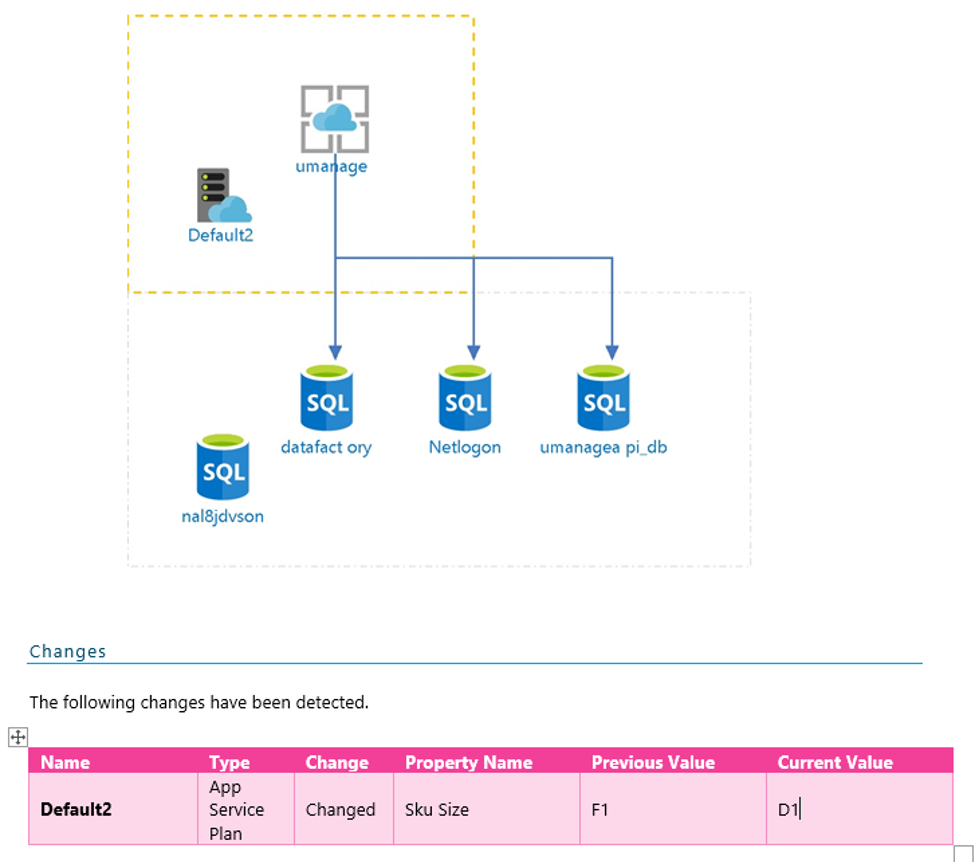
Cloudockit natively includes the ability to compare reports. You will be able to start a new report and ask the software to make a comparison with a document you previously generated. Later, in the report, Cloudockit will automatically show you the differences in detail and anything that has changed.
For example, the following picture shows an app Service plan named default2 was changed from F1 to D1.
Detect What is Wrong With Your Compliance Rules
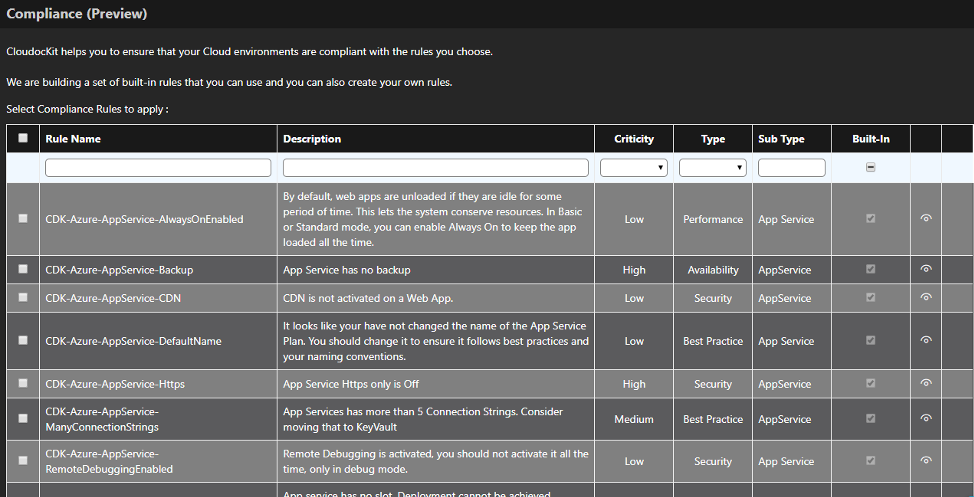
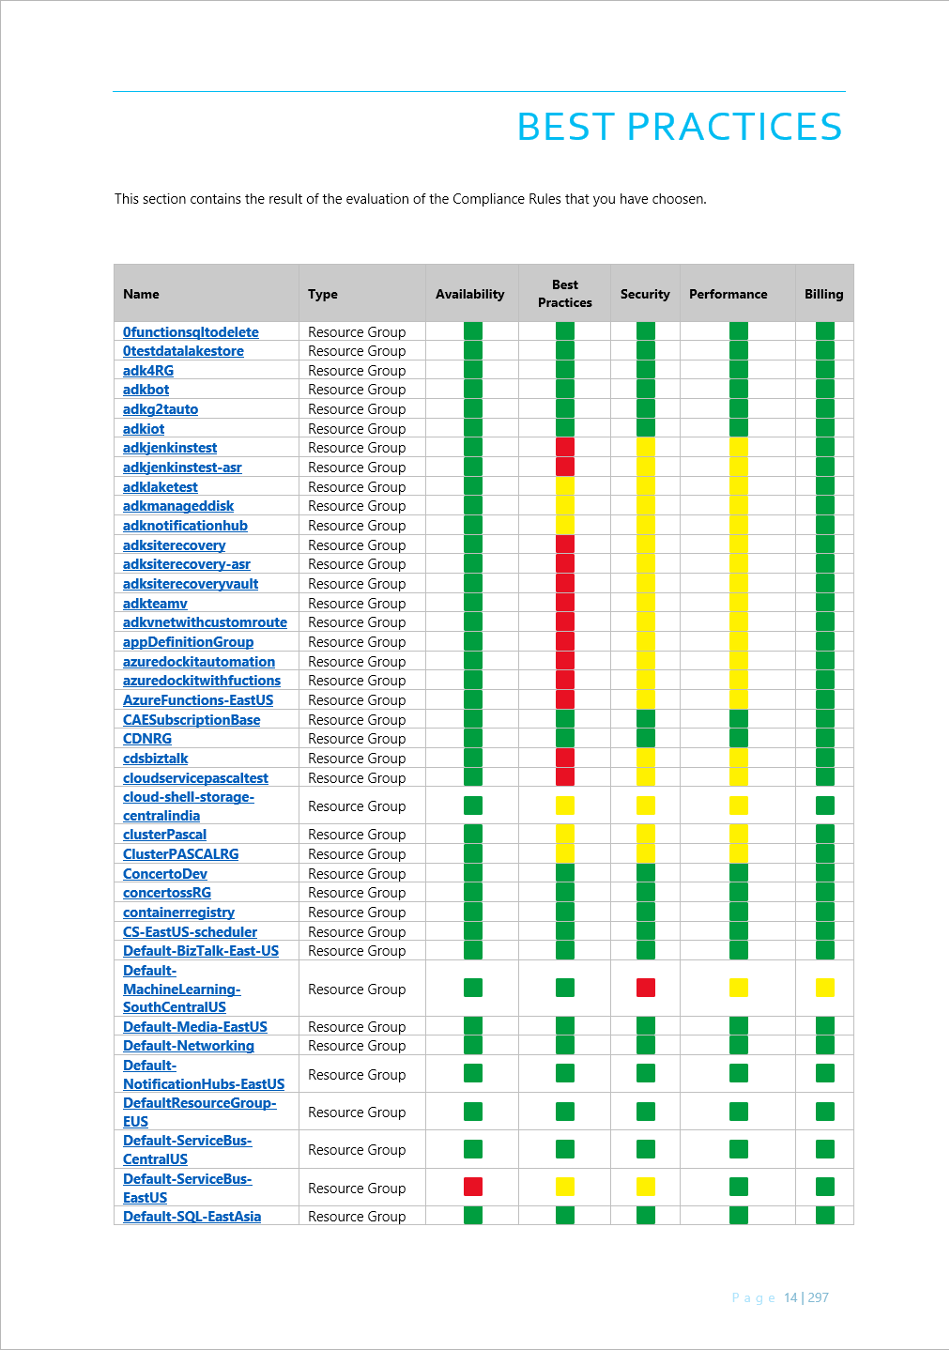
Cloudockit can validate that your Azure deployment followed best practices and does not have security issues. To do so, Cloudockit leverages the built in Azure security center recommendations and also provides custom rules. As you can see in the following image, you can select the rules you want to apply directly from Cloudockit.
When the report generation is done, you will see that the document has a summary of your component configurations. As shown in the image above.
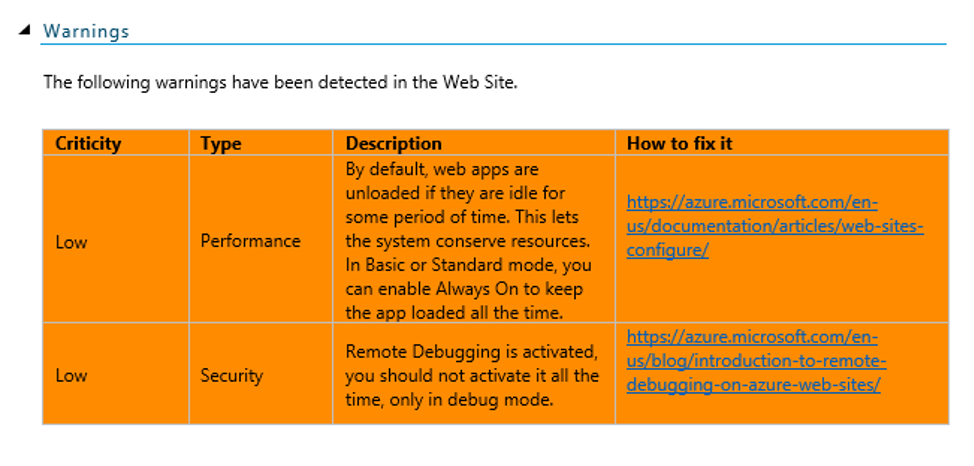
And for each component you can view the details of each error and how to fix them.
With Cloudockit, you can even easily create your own rules. This is a WYSIWYG where you can simply create your rule logic as depicted in the following pictures:
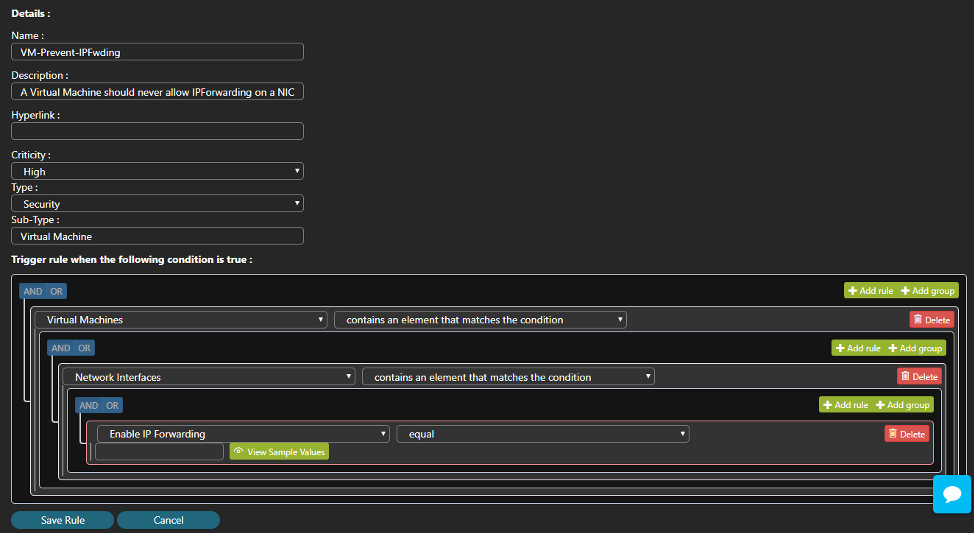
The rule presented above verifies that the virtual machine in your Azure deployment has the network interface card with the property IP forwarding equals to True, which can be a security issue.
Microsoft Azure Documentation in Various Formats
- Cloudockit provides multiple file formats to help you generate the type of reports you exactly need.
- Excel file if you need to work on the data afterward
- PDF or Word documents to obtain a complete documentation
- Encrypted PDF with a password for auditing purposes
- JSON file for custom developments or further analysis